


A Recipe for Drawing
A Recipe for Drawing
An art-making activity for you


Here’s something different for late September’s notebook entry: a drawing/painting/multi-media activity that you can try, or just read over (like reading a cookbook, which I’ve realized can be quite enjoyable.) Instead of doing a video demo, I’ve written it out in order to inspect any little grains of thoughts that might be important to the process.
The activity involves making an ephemeral/casually constructed collage as a way to start in on a painting. I patched together this method through frustration - I was trying to find a way to stay gestural and flexible during the beginning stages of a painting, and not have everything mapped out ahead of time.
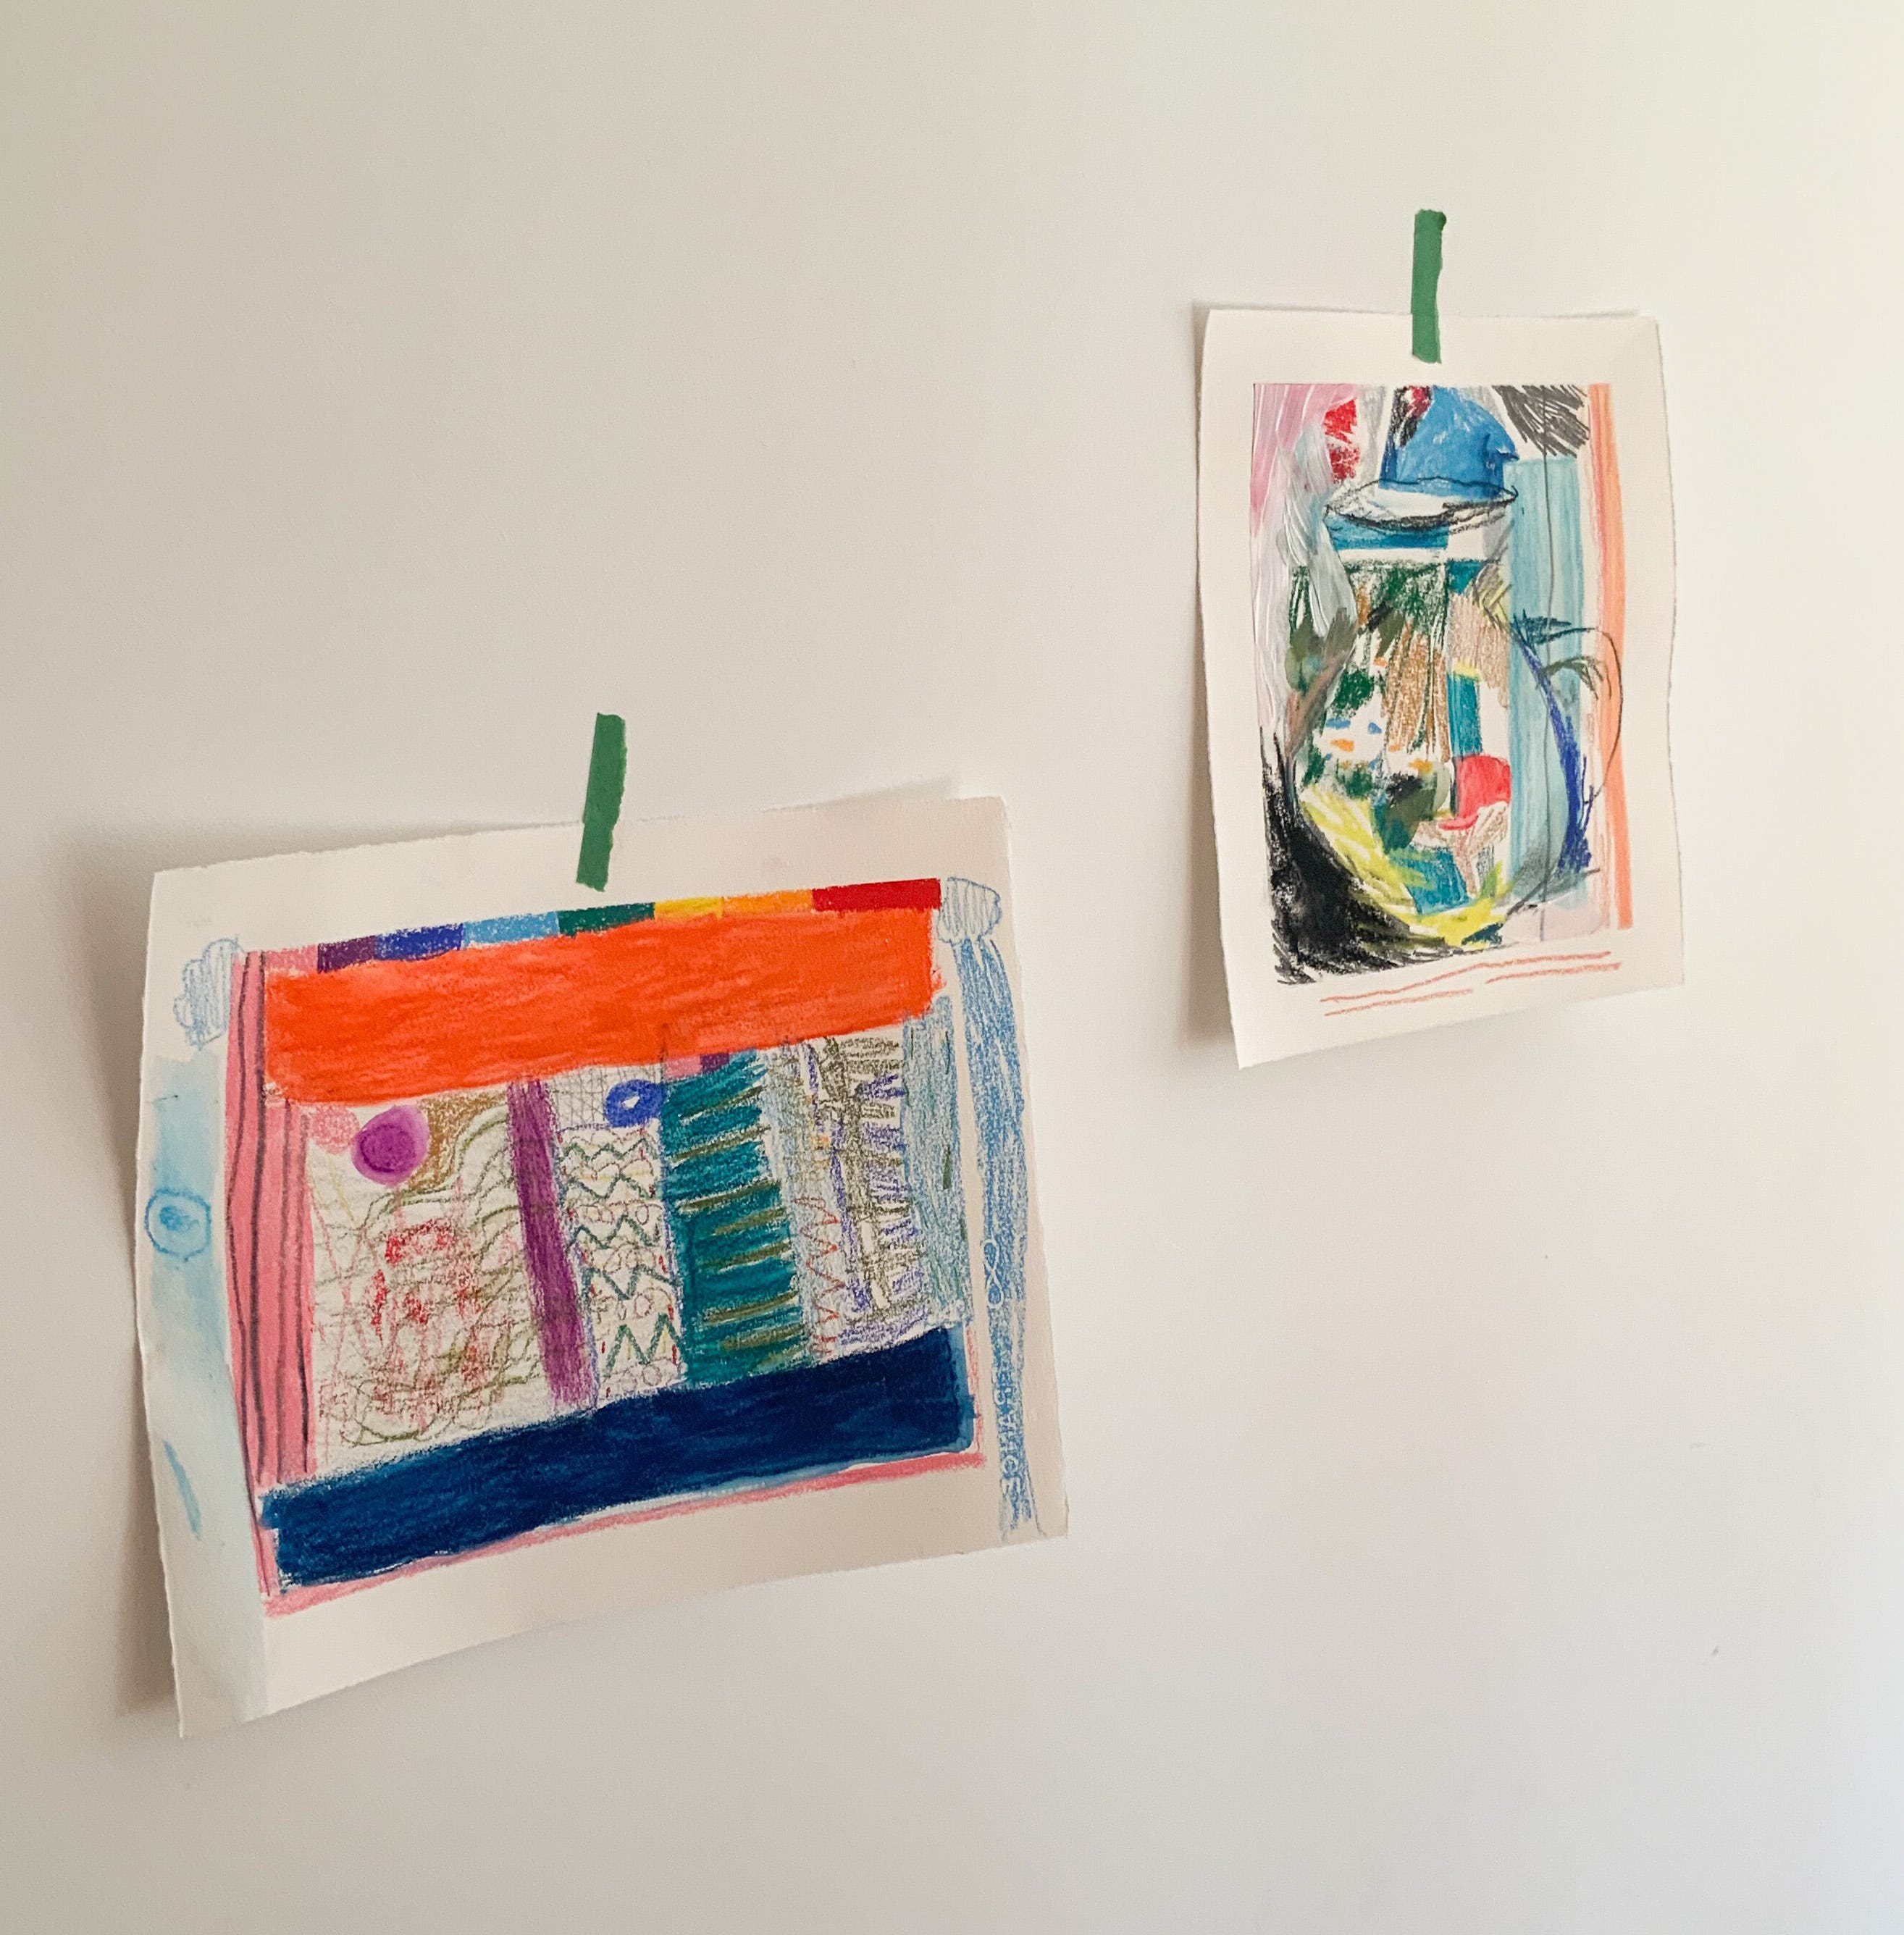
In the demo below, my 7 year old and I both tried out the exercise — I wanted to see if a kid would be into it (or find it totally boring.)
Drawing this way also puts me in a pleasant dream-like zone of thinking/being, so I thought it would be nice to share. It can be used as a way to create abstract work, inventive landscapes, curious still lifes, and so forth.
Side note: you may have to click “view entire message” in your email because I added so many photos that the message is probably clipped :D
Suggested Materials List:
- a few old magazines you don’t mind cutting into/tearing
- x-acto knife or scissors
- some paper: a piece of thicker paper like watercolour paper is nice if you have it
- masking tape
- felt pens/pencil crayons
- chalk pastels or conte
- crayons and/or oil pastels (water soluble oil pastels are very fun!)
- acrylic paint or gouache is also an option
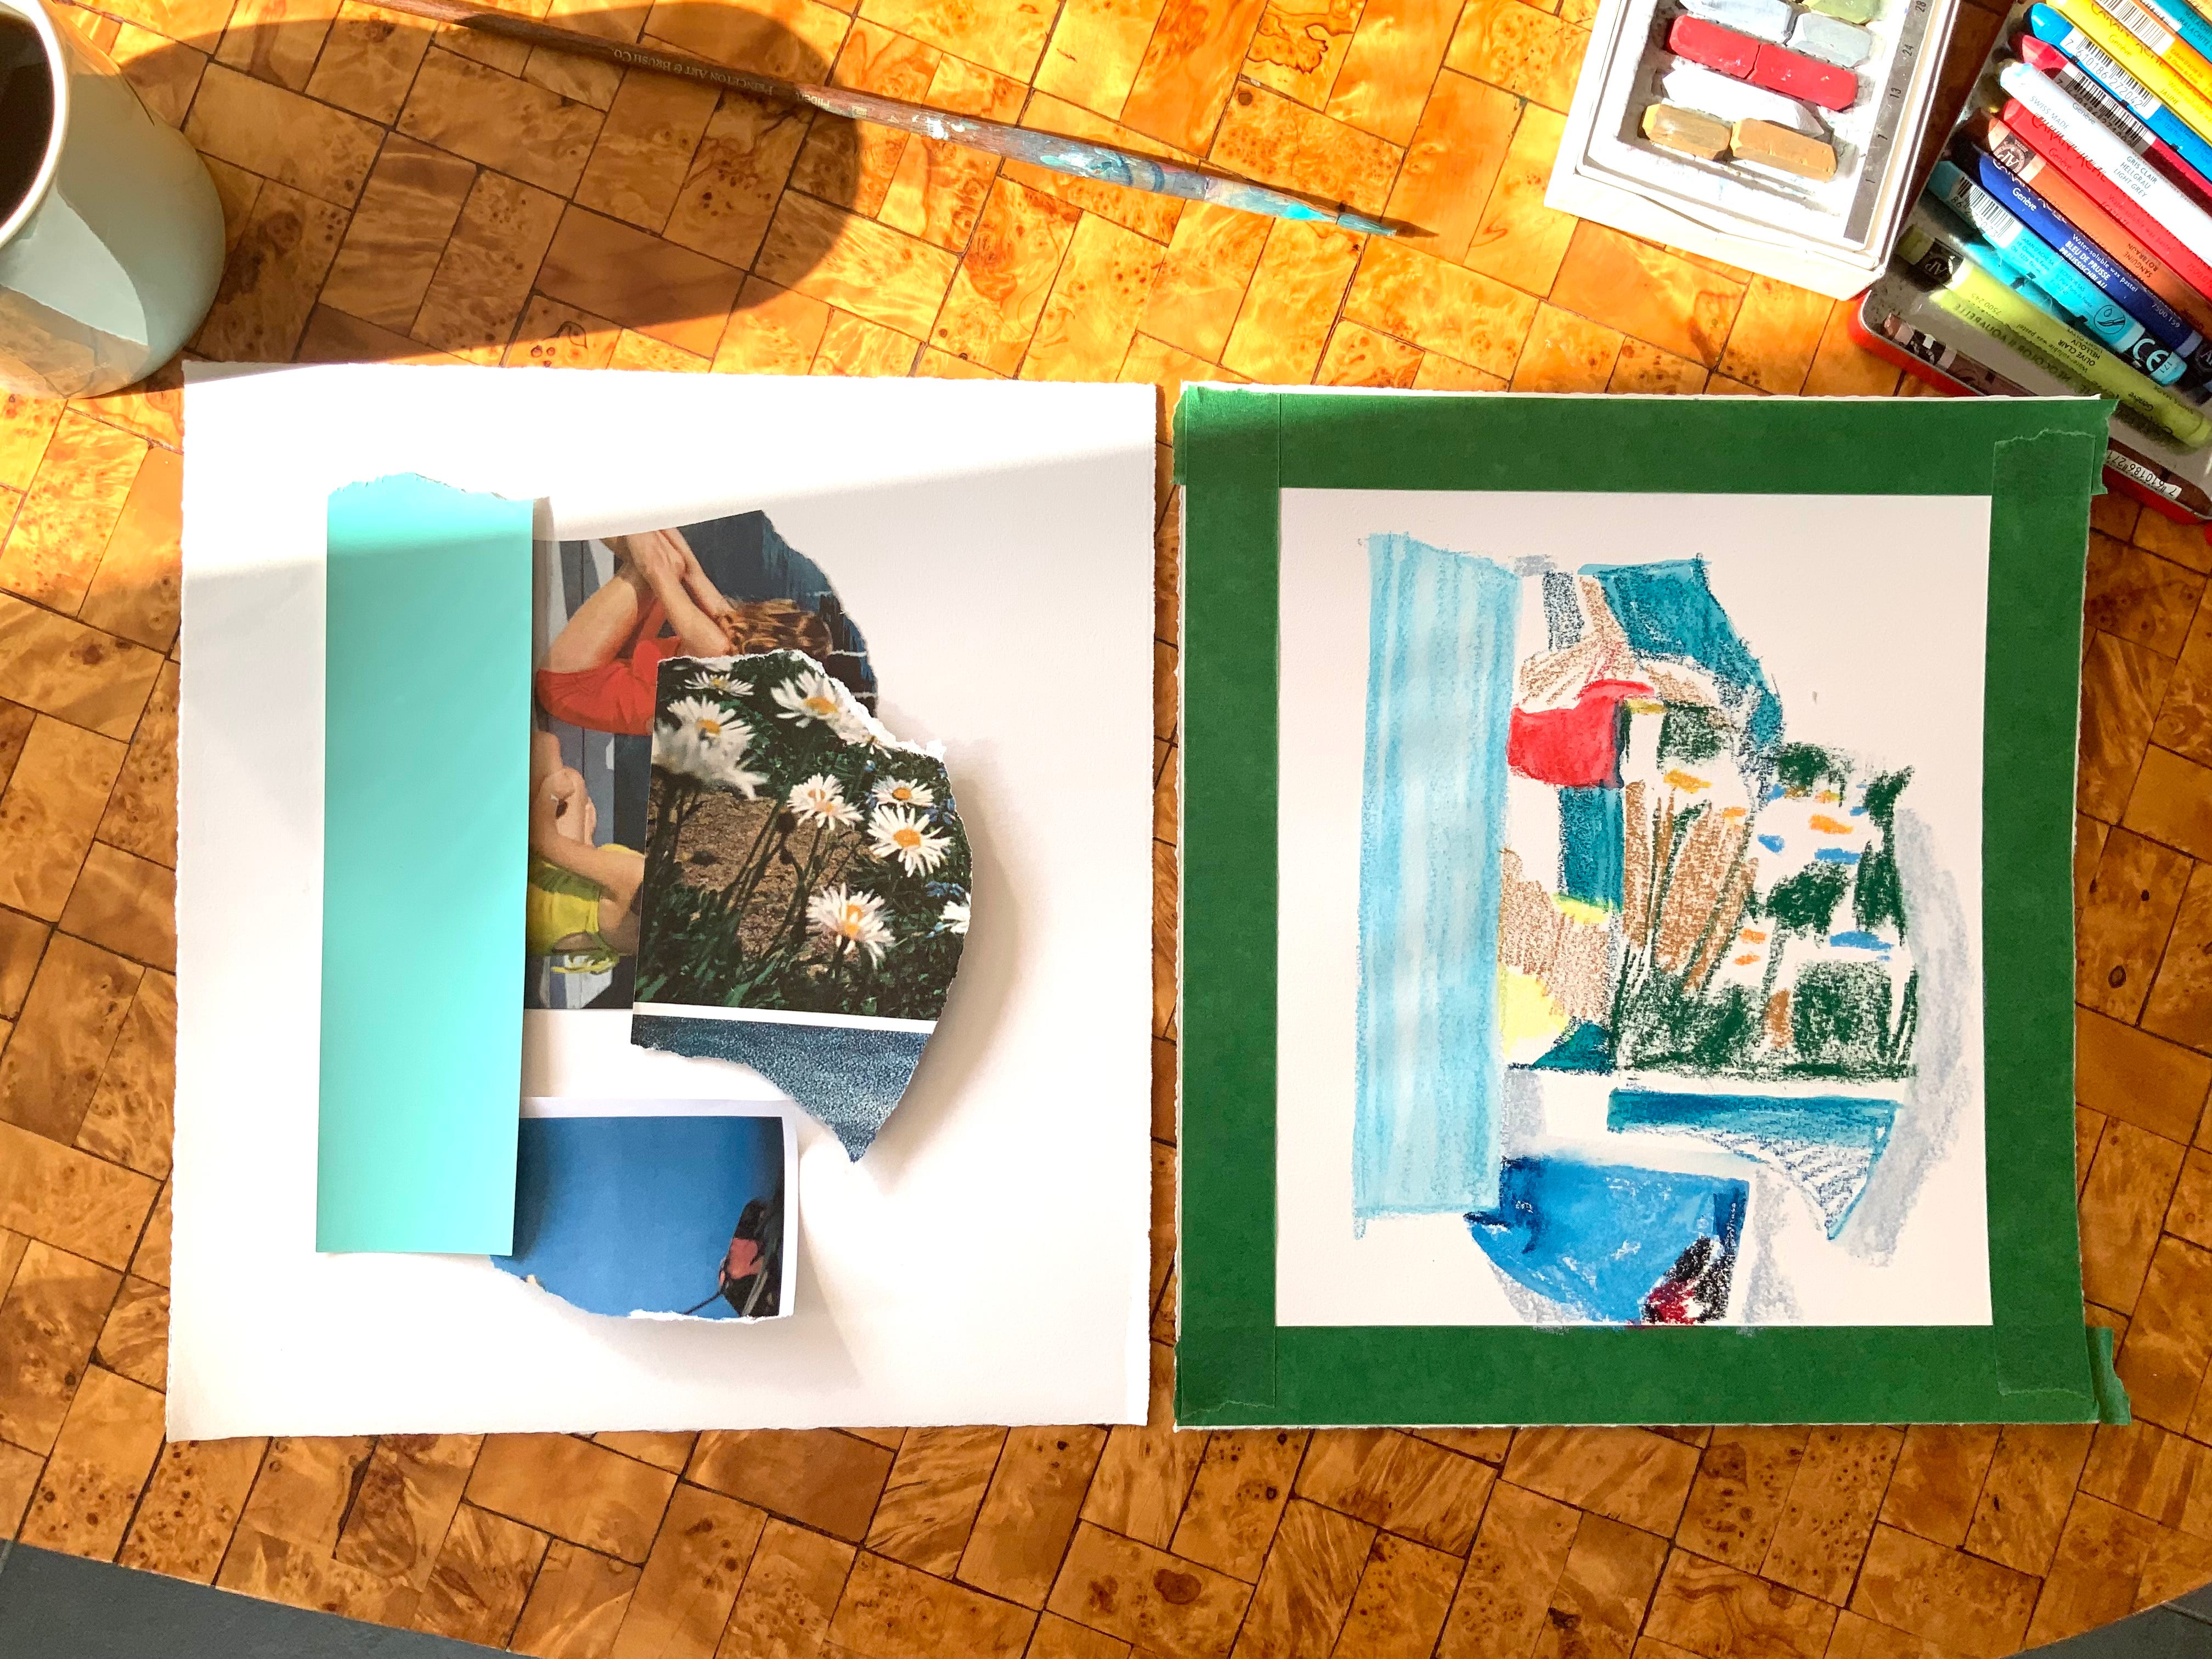
Step 1: Rip up some magazines to spark joy
I like to flip through old National Geographic mags and select bits of imagery that give me a subtle emotional reaction — usually this happens when I see turquoise or pthalo blue, and vintage plant photography. I rip out these little sections (or sometimes quickly slice with an x-acto knife) — maybe try 6-8 image pieces.

Step 2: Assembling
Place your pieces in an arrangement you find curious and/or pleasing — without being too careful.You don’t have to use all image pieces for your ephemeral collage — some just won’t work out. For inspiration, you might enjoy looking at the work of painter Michael Harnish, who uses collage for his large magazine fragment paintings.
Don’t worry too much about glueing pieces down (unless it’s very windy where you’re working).
Also take note of the surface on which you are assembling — is it white paper? pink tablecloth? This surface, and shadows cast by your pieces, can be part of your composition as well.
Step 3: Observing/drawing
Using a crayon or pencil (I’ve used a soluble wax crayon below), loosely note the composition on your piece of nice paper. You can fill in general shapes and colours, but please don’t worry about being too accurate — inaccuracies are a vital part of this foundation layer. I’ve found that having a rigid, highly rendered foundational drawing makes it much harder to change the work as you progress through it — like a concrete mix that’s too stiff.
Side note: I have taped my paper’s edges with painter’s tape in the demo photo — peeling it off later makes a nice border — an option you might like.

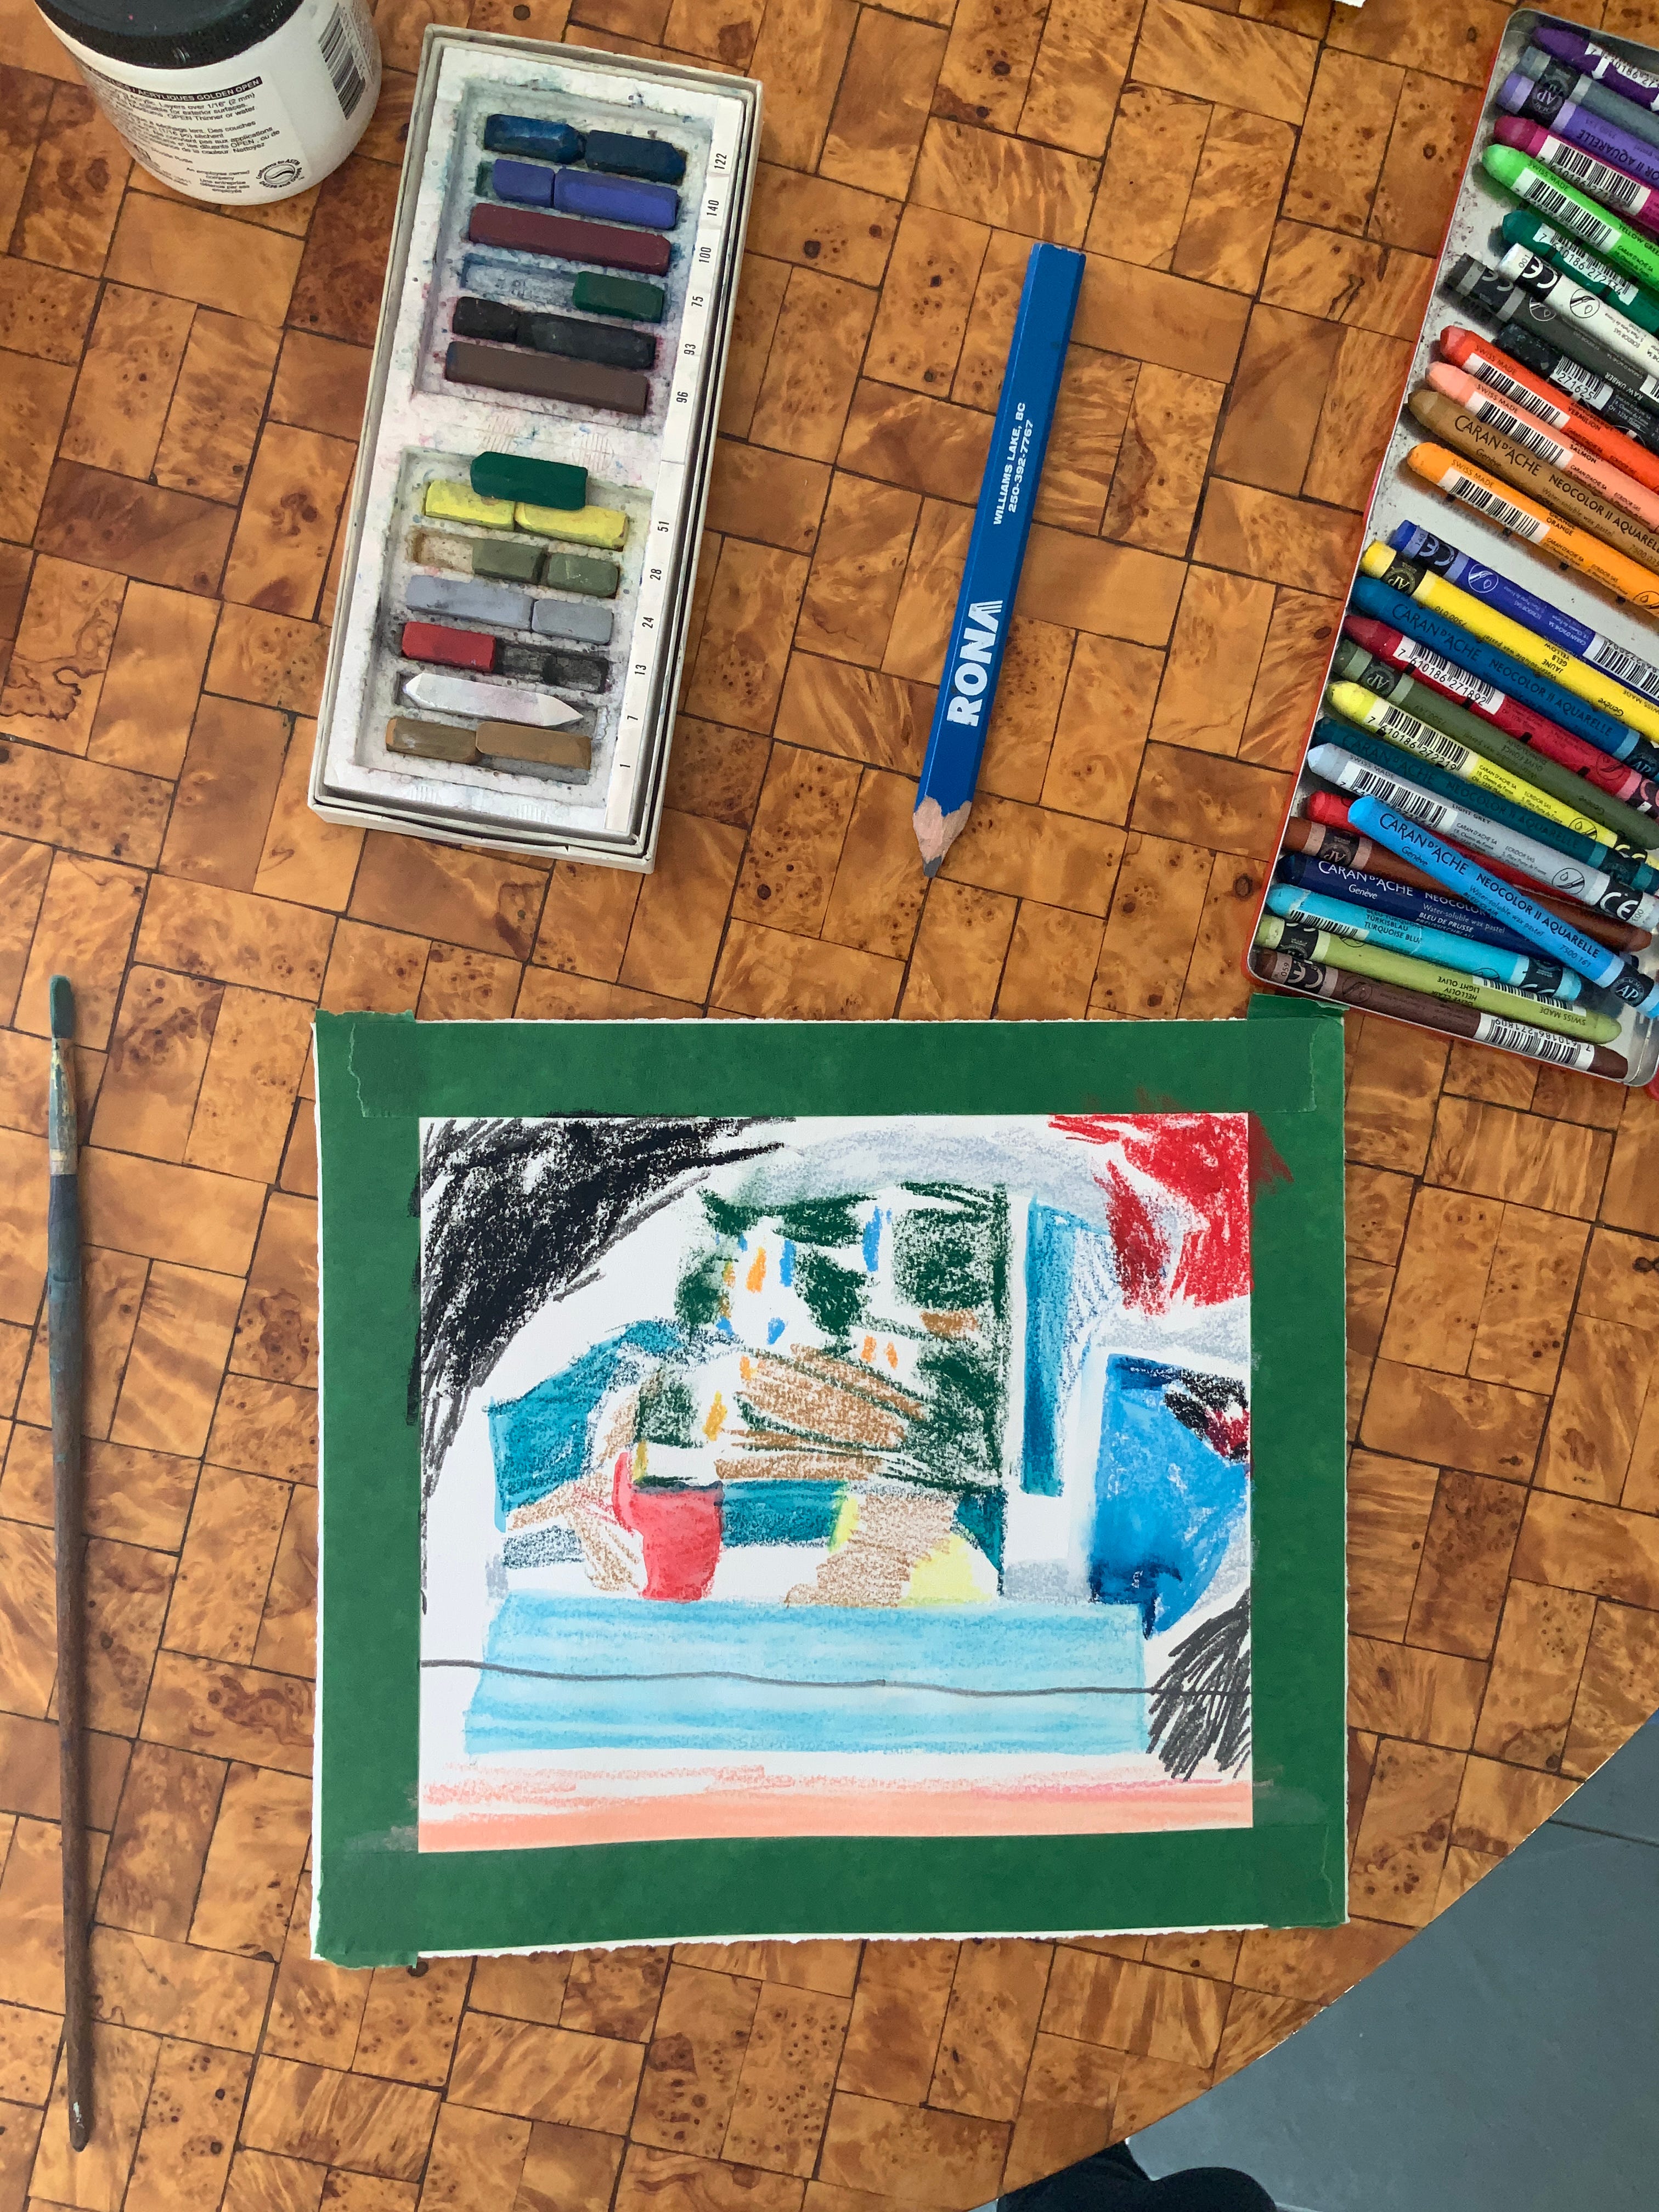
Step 4: Quarter Turn & Look
At this point we are finished with the observational drawing part, and can file those magazine fragments! To escape the visual hold of the original composition, I remove the collage bits from my work area, and I turn my nice drawing on paper clockwise 90 degrees.
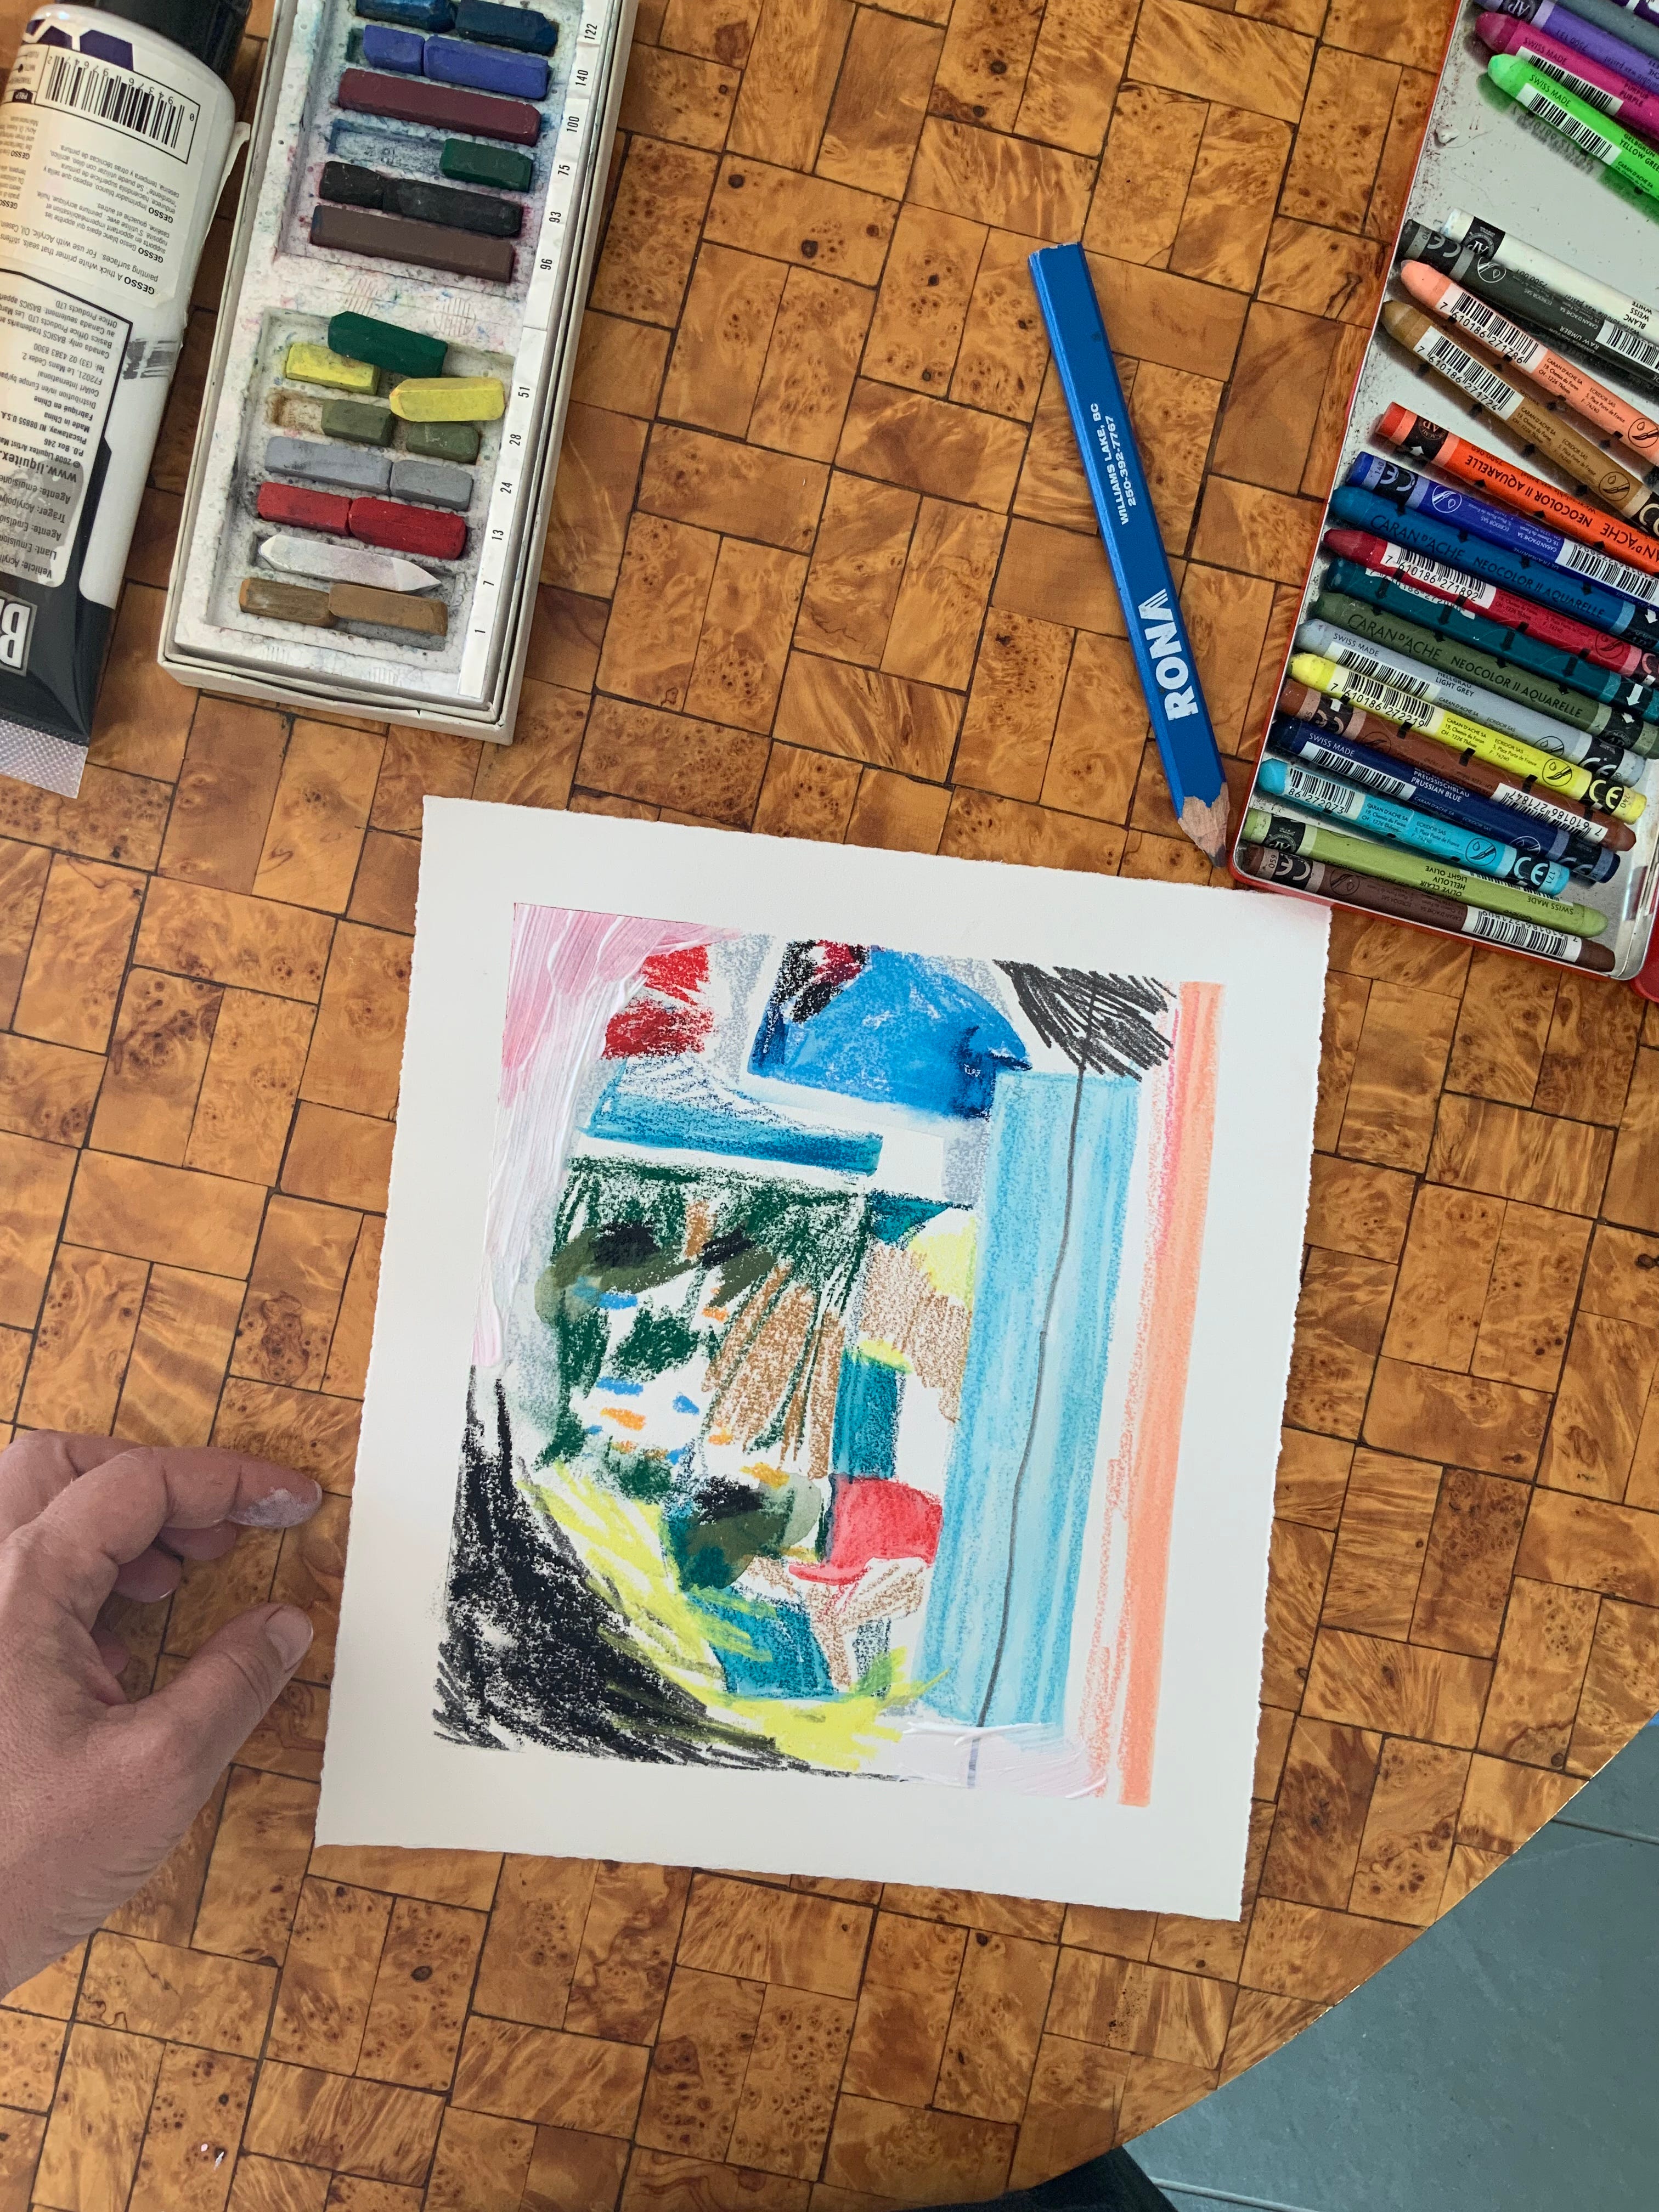
The next step is subjective, and you may feel like nothing is coming up for you: I look at the composition, and ask myself — Is there any patch of colour than can be added here? It feels similar to tasting a soup you are making and finding that it needs more salt/sweetness/sourness etc. I find that this first try can be tiny: a small scribble of blue, for example (in the demo drawing below, I’ve added a scratchy scribble of black chalk).
Another possibility, that may come up more often as you progress through the drawing, is that parts need to be edited out — feel free to use paint or thick pastel to cover over these areas. If your base paper is white, try white gesso. If it’s pink, try a matching pink paint, etc.


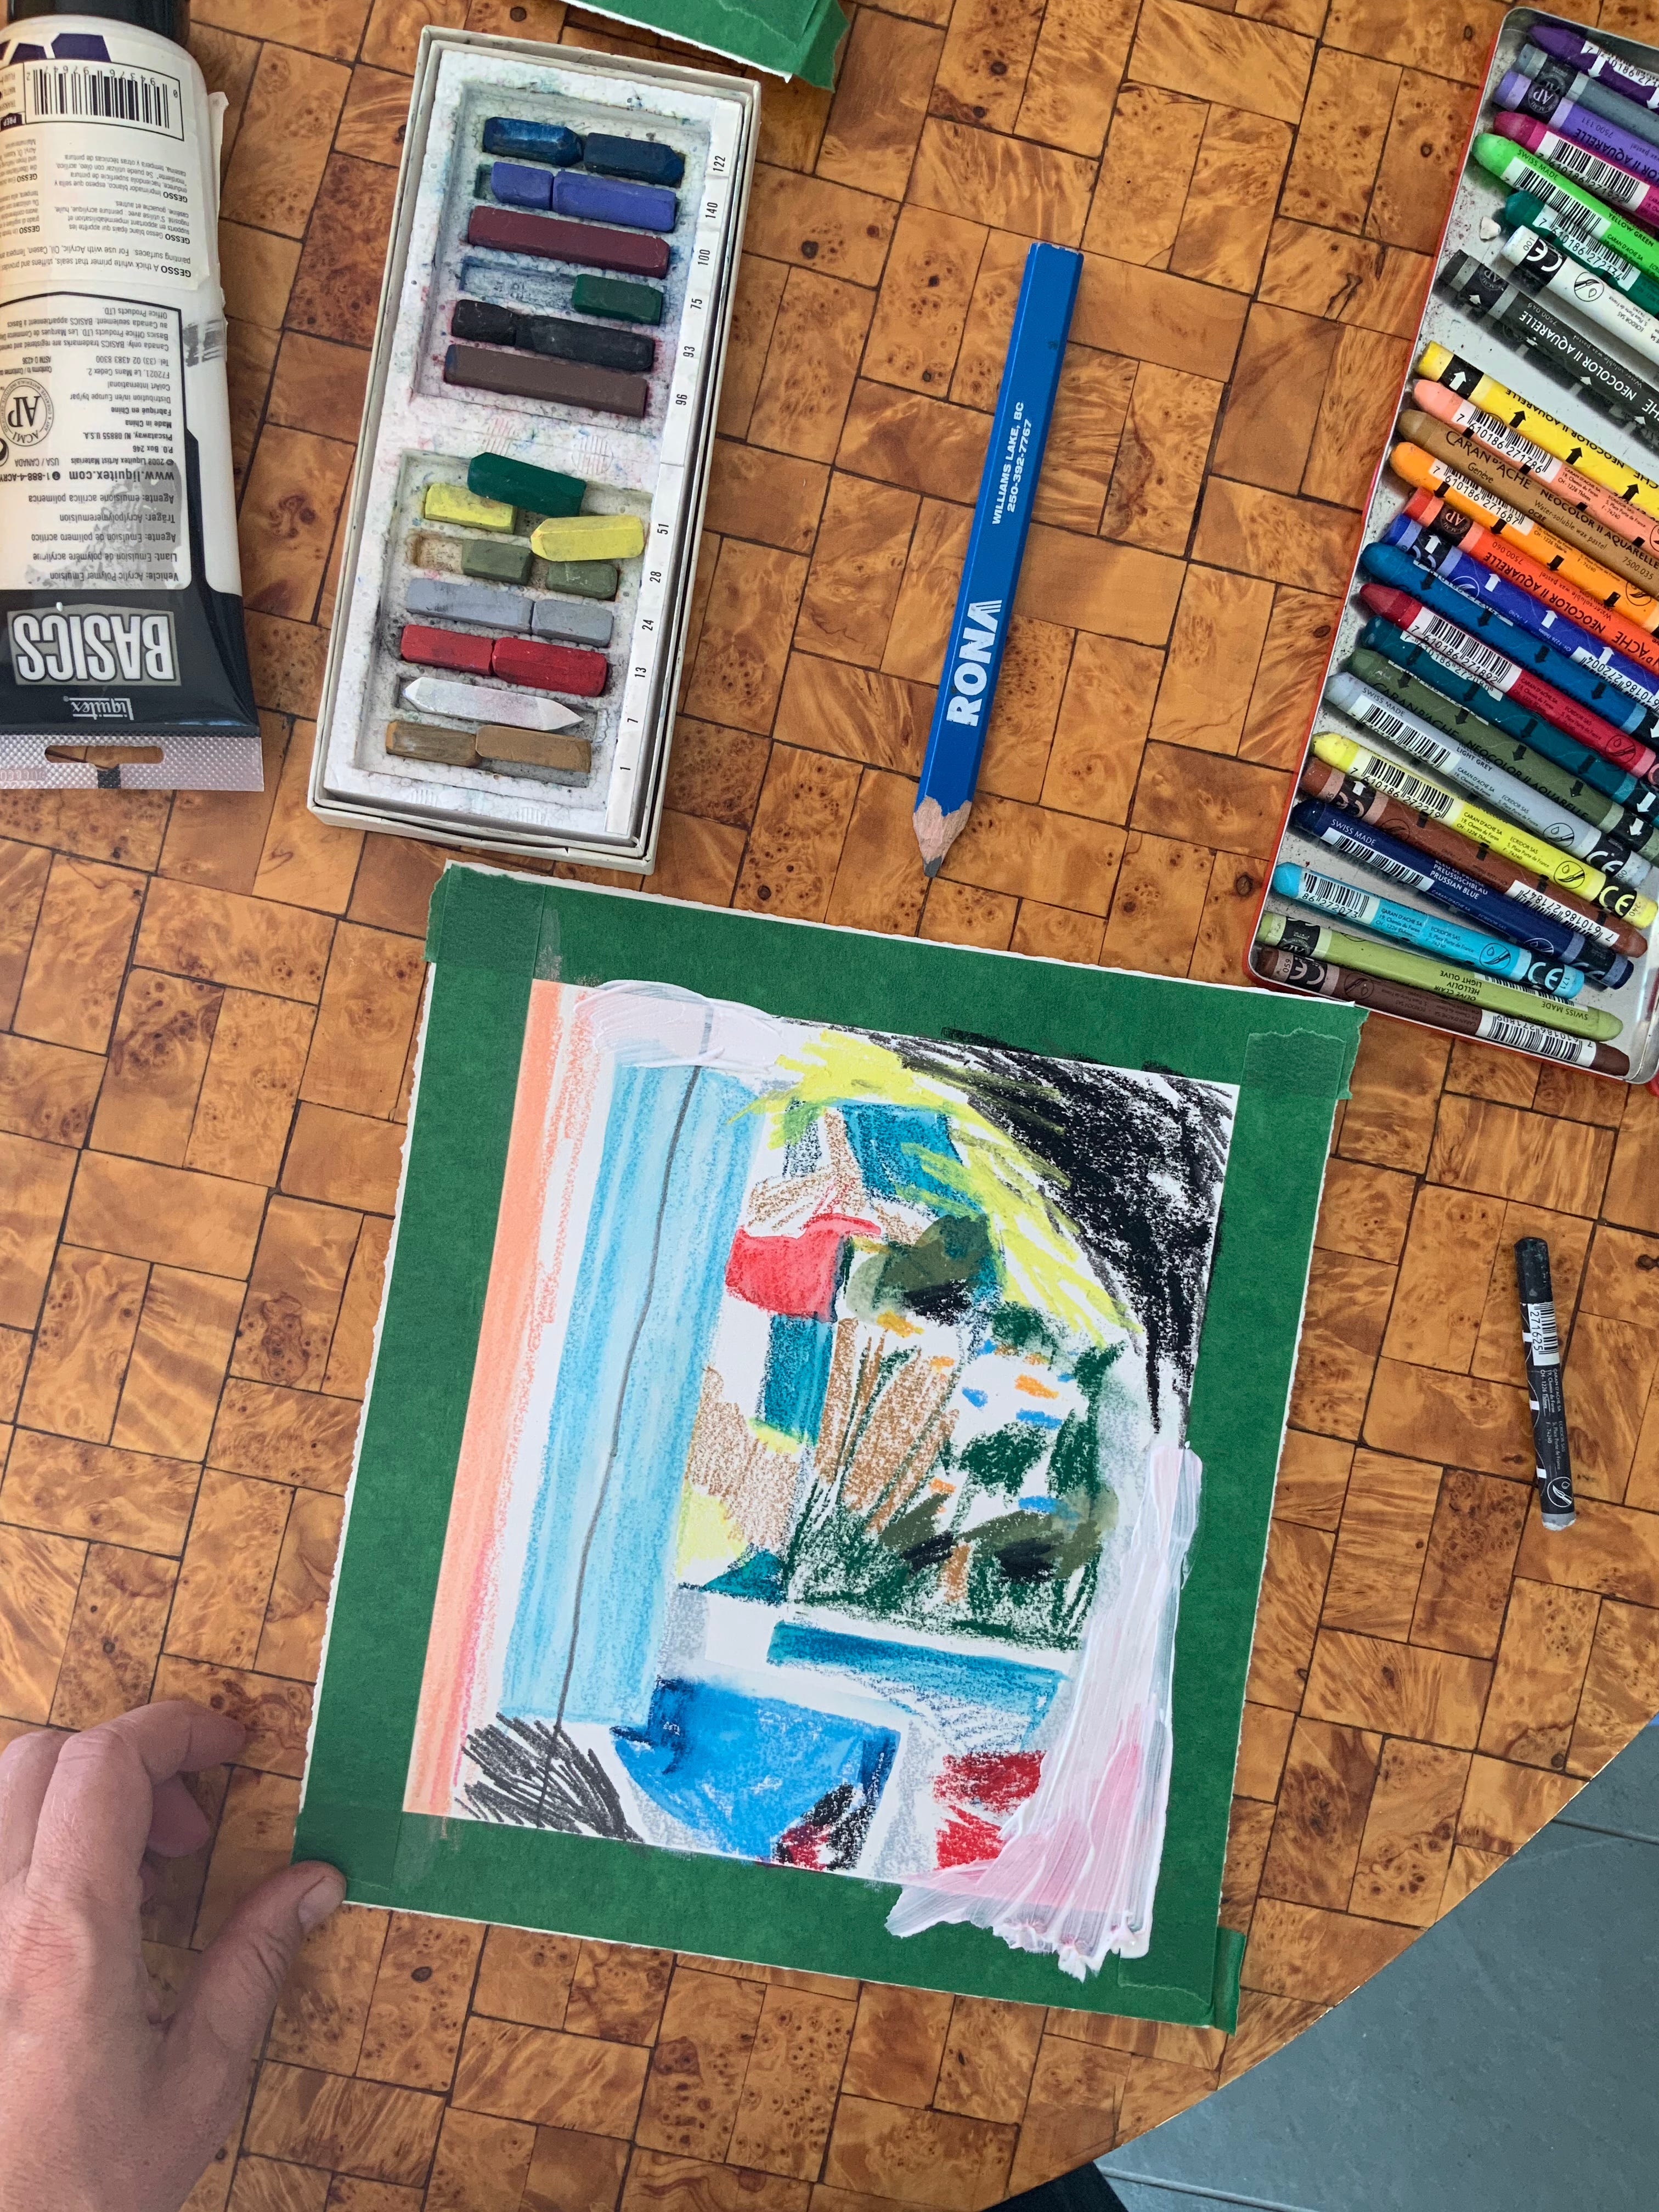
Step 5: Quarter Turn & Look (again)
Repeating step 4, the paper is turned 90 degrees again. As you repeat this step (however many turns you would like), you may find that your sense is amplified for what patches of colour can be added/removed. I really enjoy this conversation in my mind and with the drawing.
Here’s the demo drawing, showing the process of making quarter turns 4 times:

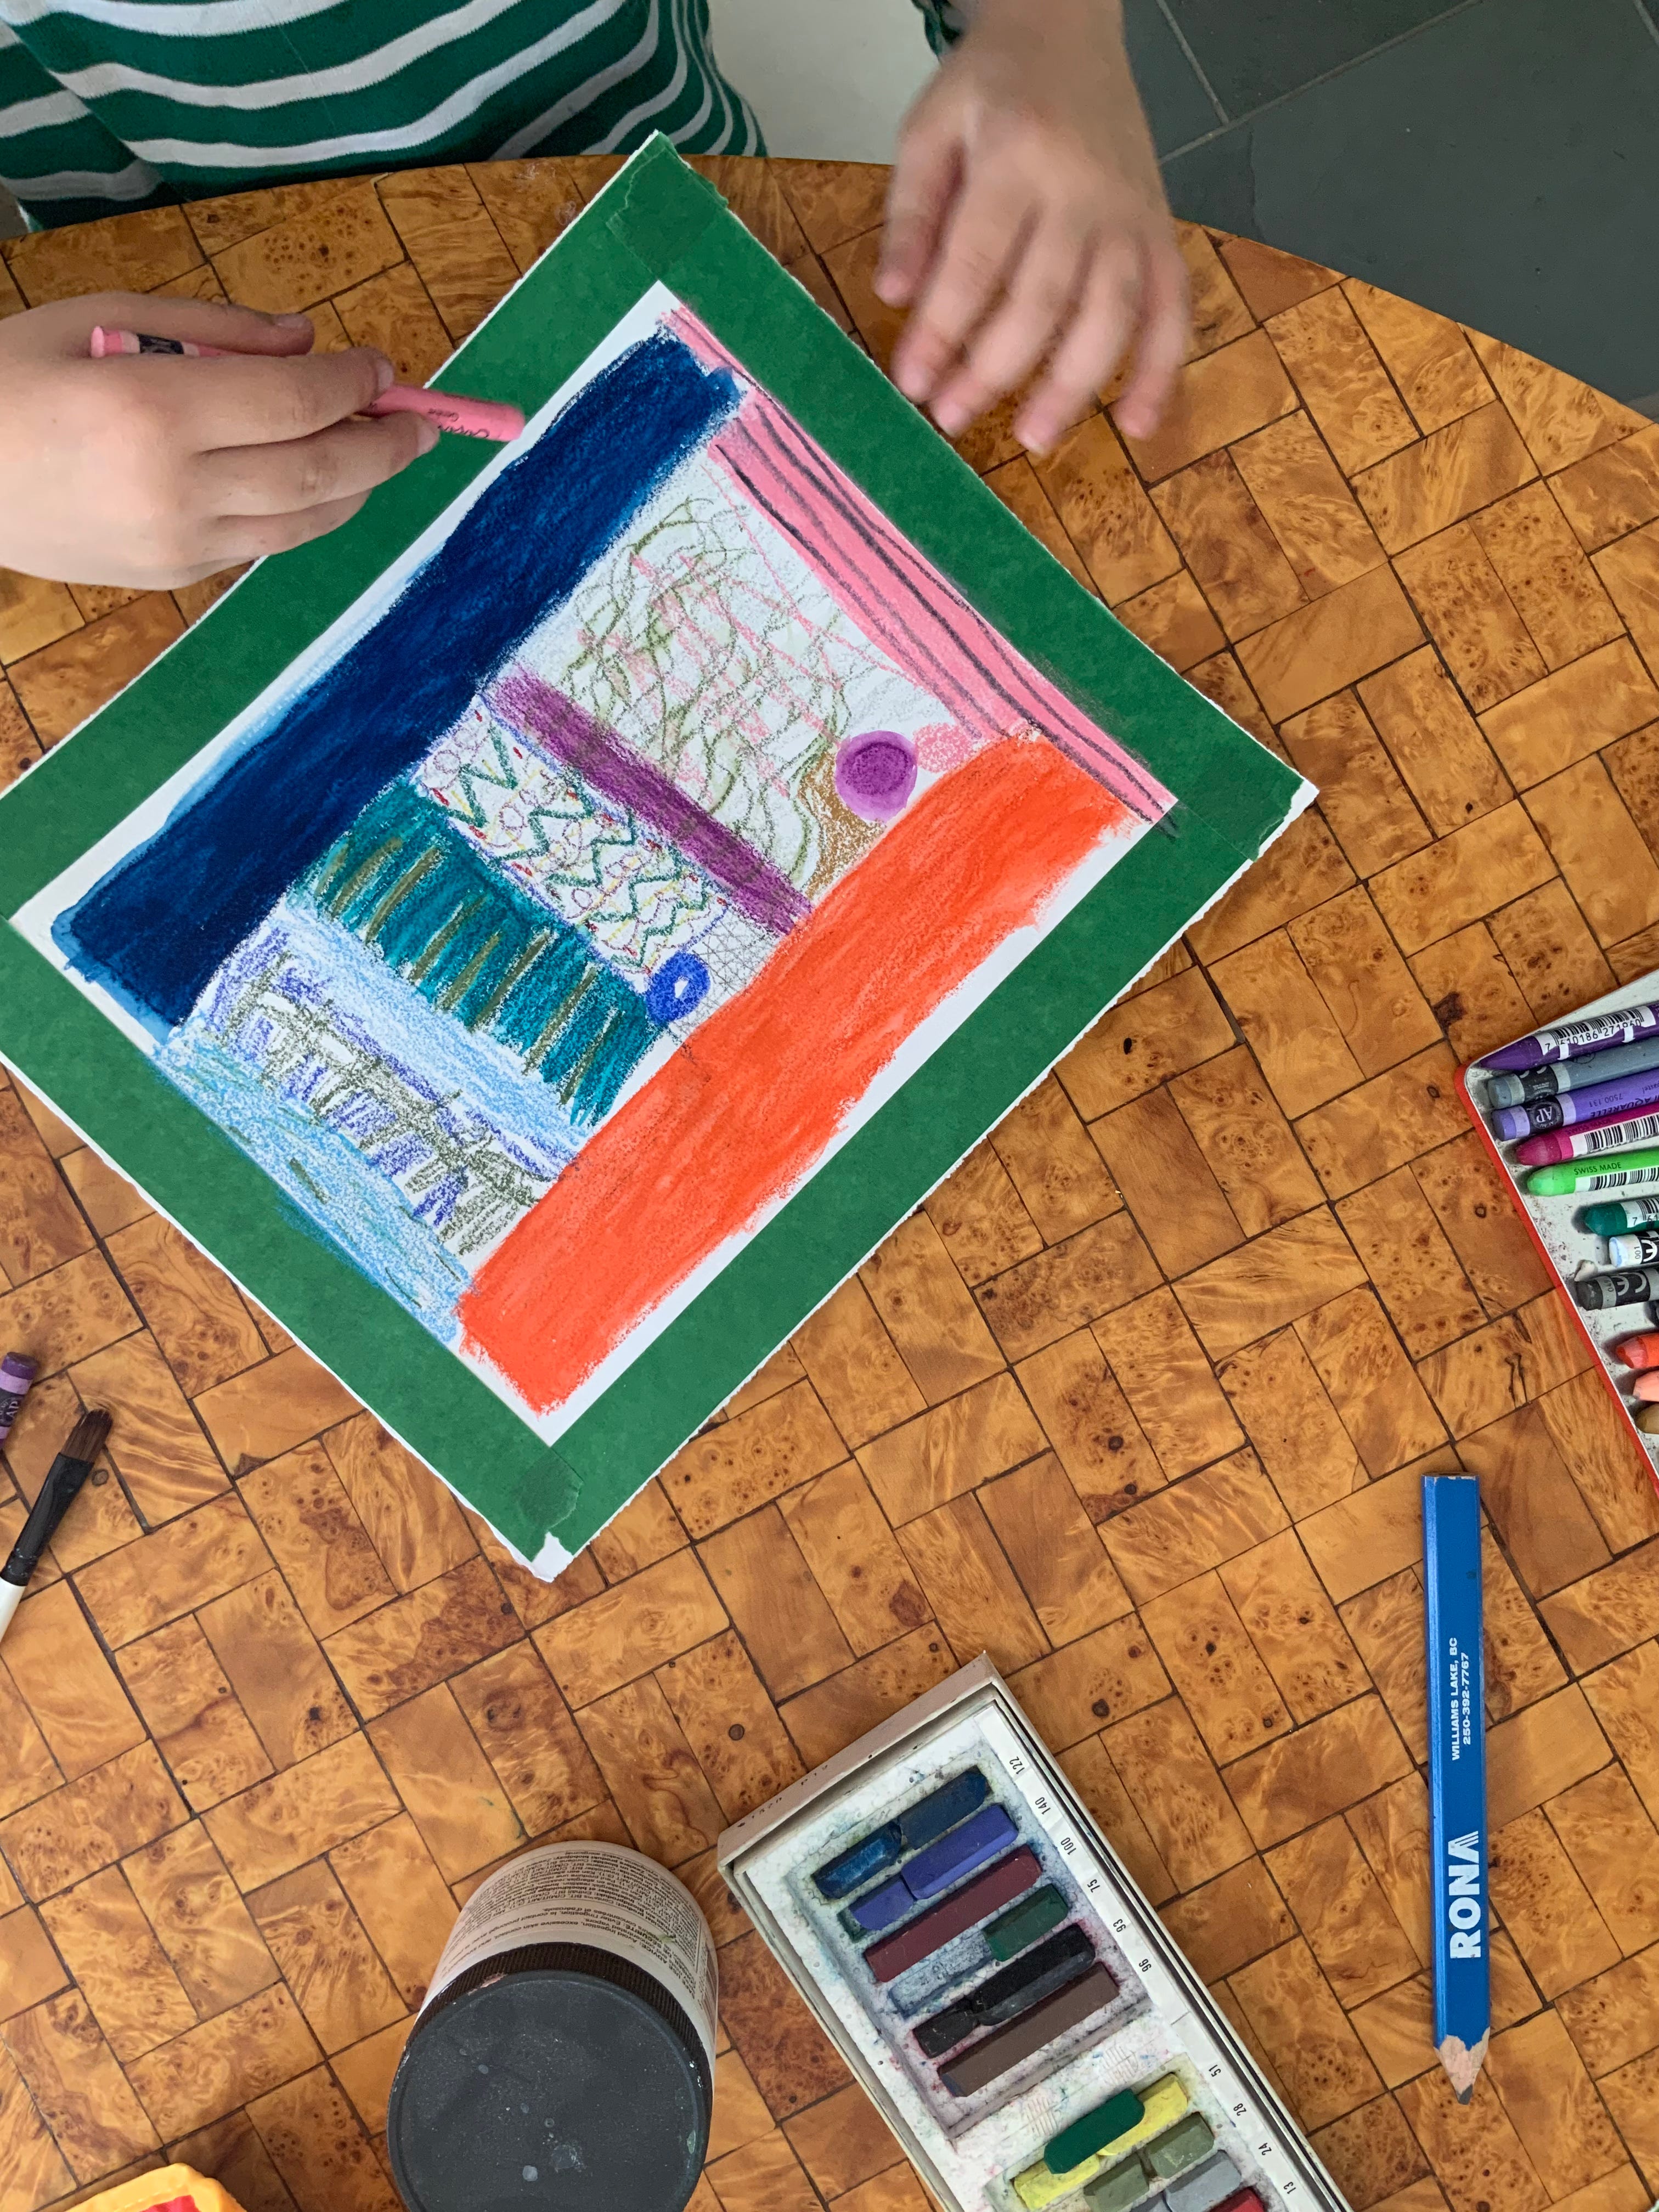
Step X (depending on however many turns you’ve made): Finding gravity
If you’ve reached a point where the drawing feels full,and there are quite enough flavours in there, it might be a good time to stop. I like to rotate the drawing and try to find which way it wants to be oriented — this might feel like the drawings’ own personal gravity.
Optional Step 2X: Finding form?
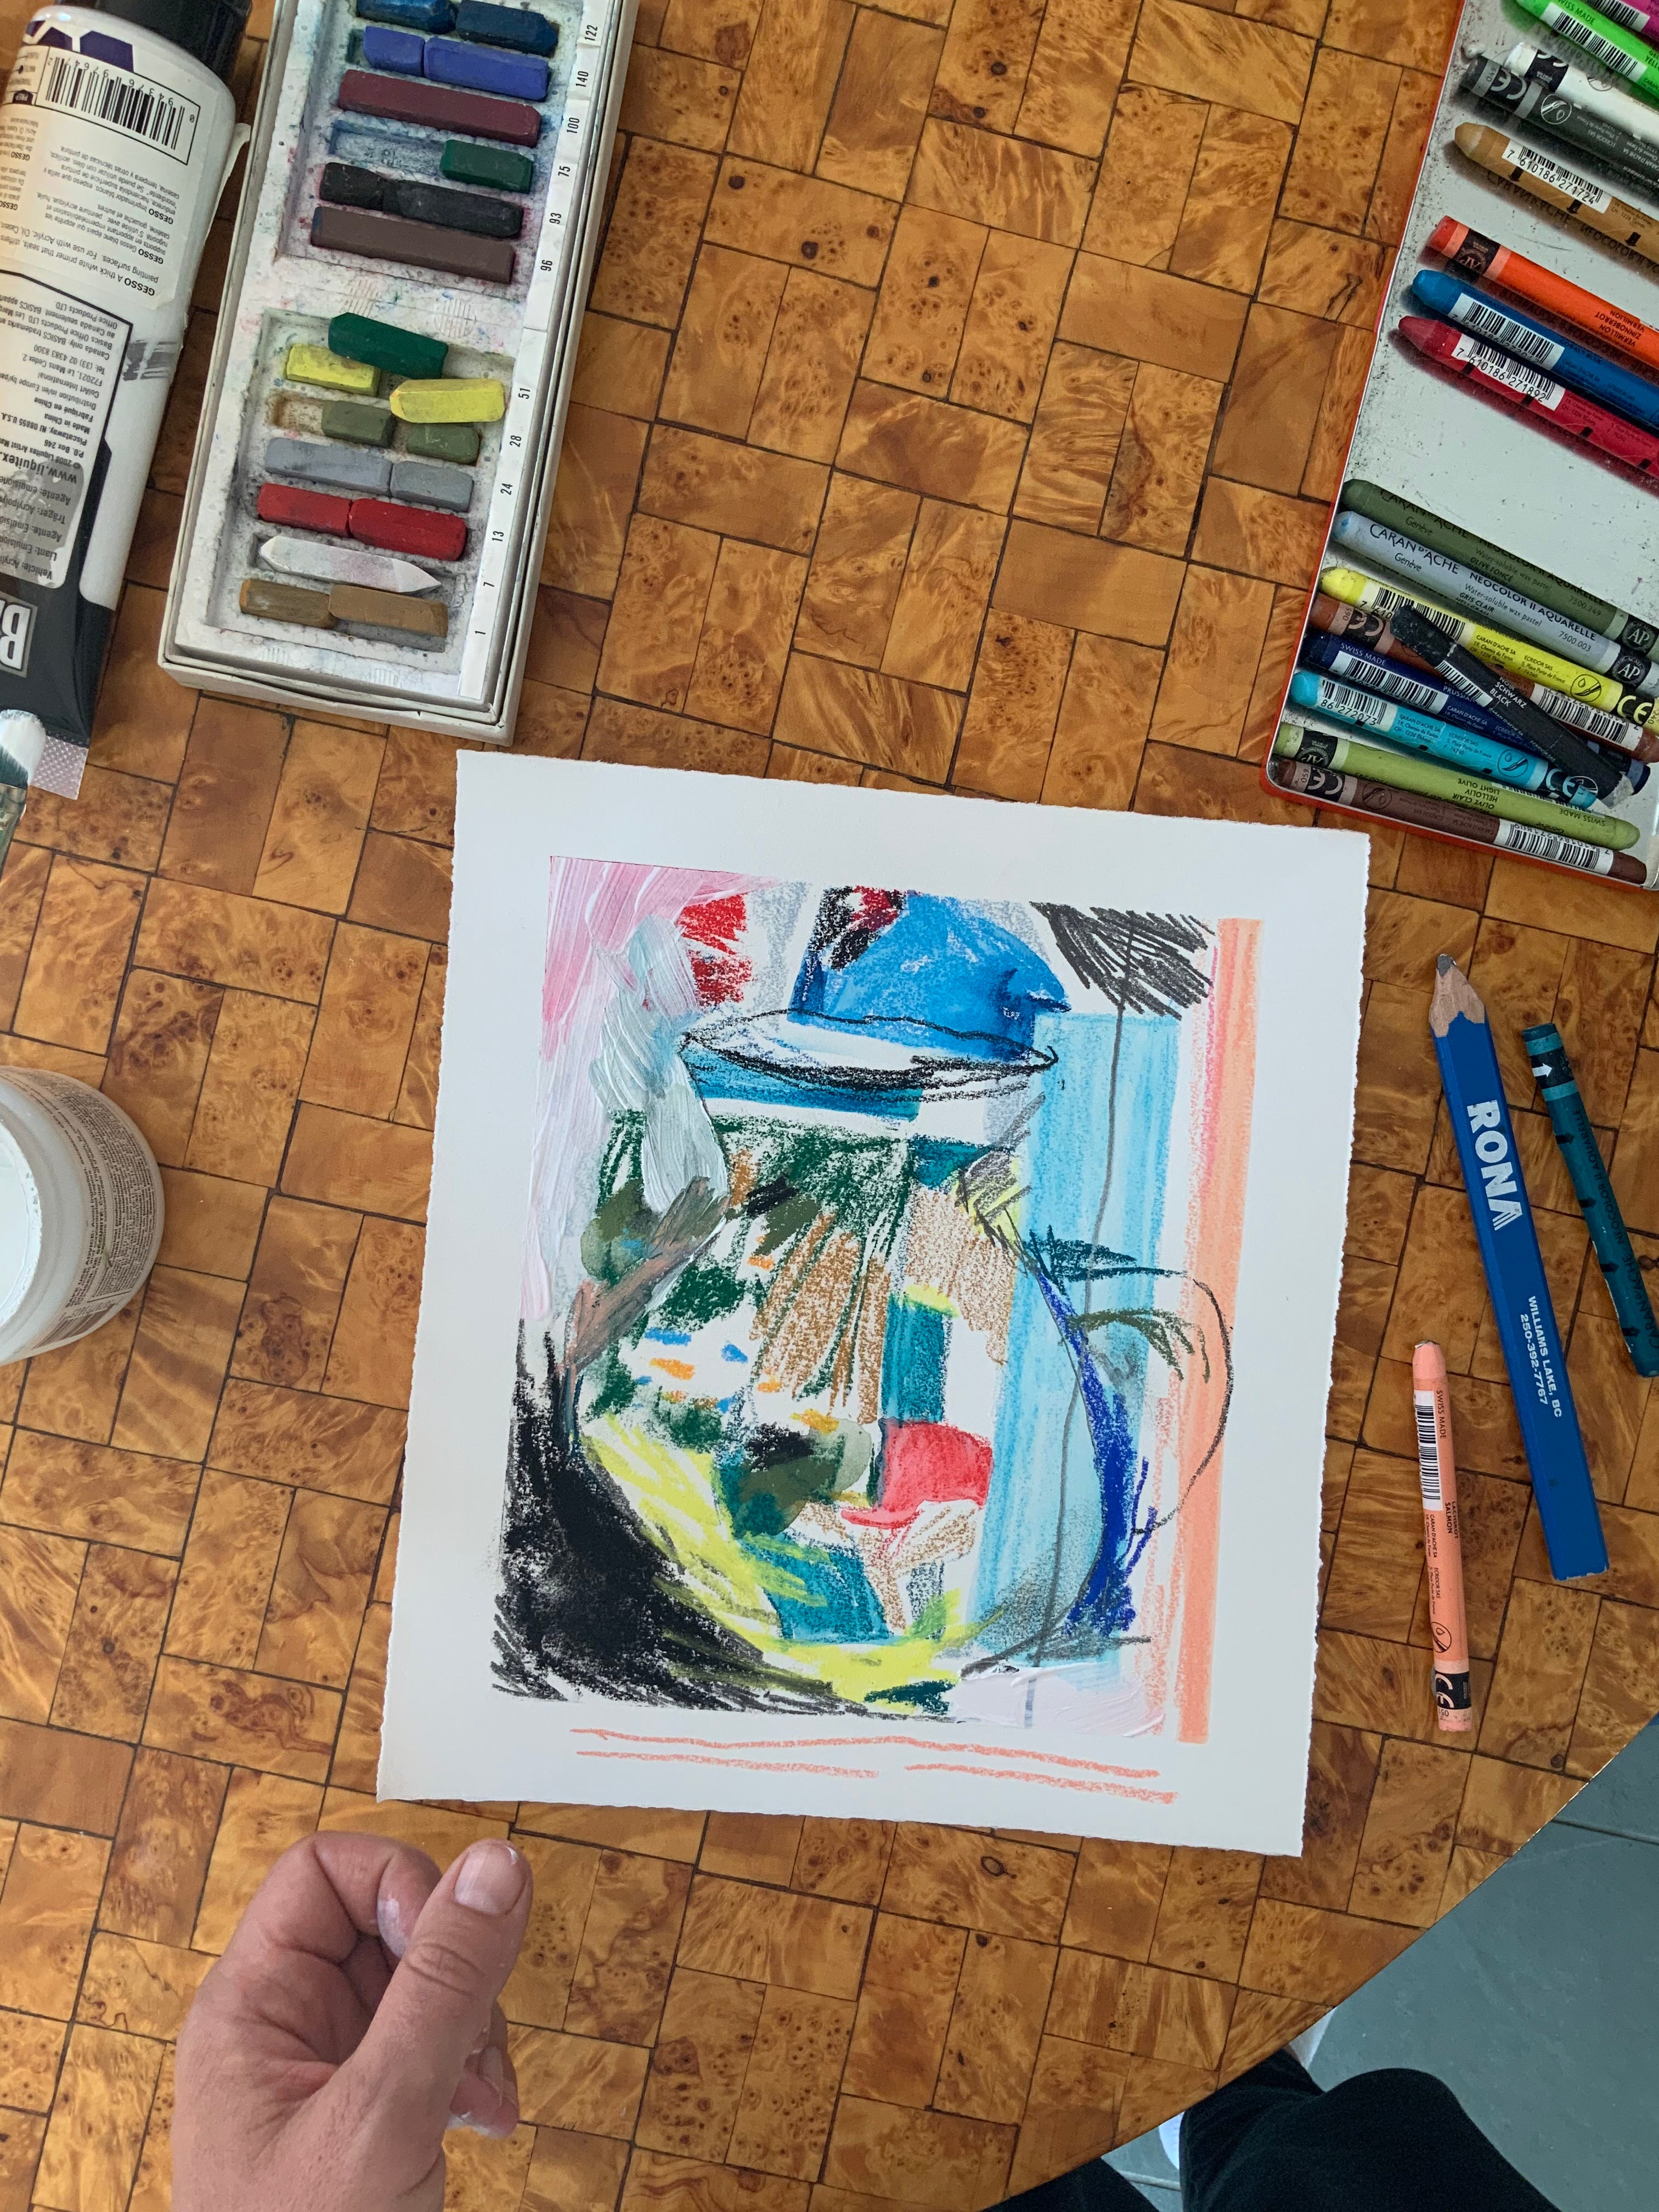
This is my favourite step — I like to follow a personal tendency to find jug/vase/vessel forms within the drawing. I use some light and dark crayons to pull out the form just enough to see it, and stop there.
You might want to keep your drawing at the previous step X, or try out Step 2X and see what emerges for you — a mysterious landscape? a curious still life?
That’s about it for this little drawing activity. I like to repeat this drawing exercise a few days in a row and make a little collection of jug and urn drawings.
Pertinent Links
- The immersive large-scale watercolour paintings of Michelle Blade that put you within the Southern California landscape
- Via the local library system, Arounna Khounnoraj’s new book Embroidery is on its way here, and also Anni Albers’ On Weaving
- It’s not really a link, I’m just really excited that mushroom season is here! I found a few lobster mushrooms during a zucchini scavenger hunt, and am most excited to find chanterelles. I love that they smell like apricots. And always looking forward to pine mushrooms too.
See you in October!
always love to add new techniques to the toolbox, thanks for sharing.
This might be something I’ll try. Thanks!!